Showing posts with label Create a Critter 2. Show all posts

Thursday, August 17, 2017

Falling For You Paper Play Sketch 49 Challenge

Hello out there!

It has been many years since I've been active on here (4) but now things are more settled in my life and I am back and in the crafting mood again and in our first house which I just realized it's been almost a year that we've been here! Three months away...crazy how time flies.

I am about to go back to school on Monday from summer break (kids come back Thursday but teachers on Monday) but I'm really hoping to be able to craft every now and then. If not during the week, then maybe on the weekends. We'll see how it goes and how busy I am this school year!

So my first papercraft creation in a very long time is a card. I just love making cards and I am using PaperPlay Sketches Sketch 49 to create my card. Since I'm going back to school, my summer is pretty much over and I'm looking onwards to the fall season and decided to make a fall themed card.

I used Create a Critter 2 cartridge to make my fall tree and the leaves are from Create a Critter cartridge. I embossed the white paper behind the tree with a leaves folder for my cuttlebug and inked over it in brown ink. I also embossed the tree with a tree bark folder. The papers are just from a Fall and Halloween stack I got from Hobby Lobby a long time ago. The brown paper also has wood grain of a tree on it. I have so much paper and embellishments that I really need to make sure I use before I go on a craft shopping spree! It's kind of ridiculous!


So there's my card and I hope you enjoy it!

Thanks for stopping by!

Jen

Saturday, June 29, 2013

Cut It Up Challenge #22--New Nations

Happy Friday!! Today's challenge at Cut it Up Challenges is "New Nations". Canada Day is July 1 and Independence Day is July 4 -  create something that celebrates either of these. Must use a die cut.

Here is what I came up with:

The dog and banner are from Create a Critter 2. The patterned paper is from a paper pack I found at Walmart. The sentiment says, "Hooray for the red, white, and blue!" Inspired from our rehearsal--we(community choir volunteers) are rehearsing for a concert to celebrate the 150th celebration of the Battle of Gettysburg. Many patriotic songs will be sung--"Dixie", "Battle Hymn of the Republic", "America, the Beautiful", "Stars and Stripes Forever", and a "Patriotic Medley" by one of my former college professors. It's going to be great. 

Thanks for taking a look and be sure to check out the other DT member's creations and how to play along HERE.

Wednesday, April 17, 2013

My Paper Crafting Challenge #130--Book


Hi everyone! It's hump day once again and it's time for a new Crafting with Cutters challenge at My Paper Crafting!

This week's challenge is:

Here is my creation:
I made this A2 card using lime green cardstock and then added this fun, colorful, star patterned paper for the background. I then cut the books and book worm from the Create a Critter 2 cartridge. I then added my sentiment banner with the sentiment, "Keep calm and read on!"

Super simple card!!

Thanks for taking a look and make sure to go to My Paper Crafting to check out the other DT member's creations and to see all the rules to play along.

Wednesday, April 3, 2013

My Paper Crafting Challenge #128--Rain


Hi everyone! It's hump day once again and it's time for a new Crafting with Cutters challenge at My Paper Crafting!

This week's challenge is:

Here is what I came up with:

This is another A2 card on a very light tan cardstock. Many cartridges were used to make this card. I used Fancy Frames to make the dark green frame, Create a Critter to make the umbrella and raindrops, Create a Critter 2 to make the cloud(just modified the cut a bit), and George and Basic Shapes to make all the flowers. The butterflies are made with a Martha Stewart punch. I added pearls to the centers of the flowers and for the butterflies bodies. My sentiment says, "April showers bring May flowers". I also embossed the umbrella and the Cloud and bent up the wings of the butterflies. Super simple card once all the cuts are cut out! 

There it is! Hope this puts a little Spring in your step and have a great Hump Day everyone!

 Thanks for taking a look and make sure to go to My Paper Crafting to check out the other DT member's creations and to see all the rules to play along.

Wednesday, March 27, 2013

My Paper Crafting Challenge #127--Easter


Hi everyone! It's hump day once again and it's time for a new Crafting with Cutters challenge at My Paper Crafting!

This week's challenge is:
Create an Easter project!!

Here is what I created:

I decided I wanted to do an Easter bunny frog for this challenge. I think he is so cute!!
Card base is a pale green A2 card with a yellow polka-dotted mat on top. I then added a blue strip of paper on the bottom for the water. The grass, lily pad, thistles, eggs, frog, cloud, and bunny ears are all cut from Create a Critter 2! I inked around everything with Tim Holtz's black soot distress ink. I embossed the rabbit ears with Swiss Dots and the Cloud with an embossing folder by the Paper Studio. I also added googly eyes to my frog and usually this frog in the cartridge has a heart in front of him but i just skipped that layer and added the egg in front of him for this Easter card. The sentiment says, "Hoppy Easter!!" 

There it is. Hope you have as much fun with this challenge as I did! 

Thanks for taking a look and make sure to go to My Paper Crafting to check out the other DT member's creations and to see all the rules to play along.

Have a great Hump Day!


Friday, March 22, 2013

Cut It Up Challenge #15--March Lion/Lamb


Happy Friday!! Today's challenge at Cut it Up Challenges is "March comes in like a lion, goes out like a lamb".  Use a lion or a lamb on your project. Must use a die cut.

Here is what I created:
I used a light blue cardstock to make this A2 card. I took some green paper and embossed it with a swirly pattern by the Paper Studio. I then cut the tree from Create a Critter 2 and embossed the tree trunk with a bark folder, also by the Paper Studio. Then I cut this cute little girl/lion from the Trick or Treat cartridge and stamped "Happy Spring" on the bottom. 

Easy peasy!!

Hope you have as much fun with this challenge as I did! Thanks for stopping by and taking a look and make sure to check out the other DT creations and find out how to play along at Cut it Up Challenges!

Also entering this card into:
My Craft Spot's Challenge #91-Embossing or Glossy Accents

Friday, February 22, 2013

Cut It Up Challenge #13--Pinterest Inspired!

Happy Friday!! Today's challenge at Cut it Up Challenges is "Pinterest Inspired". Create a project that was inspired by something you saw on Pinterest.  If you do not have a Pinterest, feel free to get inspiration from a fellow crafter. Very Important, give credit to the original source for where you got your inspiration!! A link to their project is fine. Must use a die cut.

So here is my Pinterest inspired creation:
 I made this piano card to leave in the staff room when I am finished with my long-term substitute job. I was subbing for 3 months in a K-5 elementary music classroom. Music is what I got my degree in and what I'm going for career-wise. I have two days next week, finishing with Parent/teacher conferences and then I go back to moving through 2 districts and many schools. There were so many takes on piano cards and I combined some ideas embellishment-wise, but my overall design came from this blog that I found through Pinterest: http://flowersparkle.blogspot.com/2012/07/piano-birthday-wishes-card-for-alan.html

This is an A2 card and I just hand drew the curve with a pencil and cut along my line for the front of the card. I added the strip of white paper and drew one inch lines in pen for the keys and then added black strips of paper for the black keys in groups of 2's and 3's. I think the black keys are 1/4" wide but not sure how long they are...
 I added this pretty, sheer, blue ribbon and I had to triple it so it wasn't so see-through. Then I added the 2 grey flowers and blue rose. They are so sparkly and it was quite the mess on the table when I added these! The butterflies were punched out and then I added three blue pearls to each butterfly and bent their wings up.


 The inside I added my sentiment that I made on the computer: "Just a note of thanks". This is for the teachers at the school that made me feel so welcome there and were a big help to me. I will also be making a second one for the music teacher I subbed for. I'm going to miss those kids so much. My die-cut is the music notes on the inside and they are cut at 2.5" from the Create a Critter 2 cartridge.
The opposite side is music notes/symbols paper and is just for looks and looks so neat when you close the card. 
There you have it! Super easy and elegant!! 

Thanks for stopping by and taking a look and make sure to check out the other DT creations and find out how to play along at Cut it Up Challenges!

Wednesday, February 20, 2013

My Paper Crafting #122--Love Your Pet Day!


Hi everyone! It's hump day once again and it's time for a new Crafting with Cutters challenge at My Paper Crafting!

This week's challenge is:

Here is my creation:


I used Create a Critter to make the "Purrfect" title, Create a Critter 2 to make the black cat, and Accent Essentials to make the circles. I also added some bling with the paw prints and then added two green rhinestones to my black cat for his eyes. Just like my baby, Nightfury. :) 

Thanks for taking a look and make sure to go to My Paper Crafting to check out the other DT member's creations and to see all the rules to play along.

Have a great Hump Day!


Wednesday, January 9, 2013

My Paper Crafting IFTL Challenge

Hi everyone! Happy hump day!!

Today's Crafts with Cutters challenge at My Paper Crafting is:

IFTL stands for I Feel the Love and you can check out their blog HERE. This week's IFTL recipient is in memory of Victoria Soto.  As you may remember, Victoria Soto was a 27 year old first grade teacher who gave her life protecting her 1st grade students in the Sandy Hook shooting. Because of her actions, 6 or 7 of her students survived(number still to be confirmed). 

Being a teacher myself(music) and also 27 yrs. old, this really shook me as I'm sure it did many of you. Still praying for all those that were affected by the shooting and thinking of those teachers who did what they could to protect those little ones. 

So, in honor of Ms. Soto, we will be making Valentine's Day cards with hearts on them to send to the students that survived in her class. Here is my card:
 The cuts are from Create a Critter 2 cartridge and the paper background with the monkey border is from DCWV's "Animal Crackers" stack.
Then on the inside I cut the sentiment, "Bananas 4 U" and the bananas from Create a Critter 2 also. This is an lime A2 card with a tan mat and then the red patterned paper on top and then on the inside I added one more tan mat for the sentiment. 

To see where you can send your Valentine's card to be sent to the students, please visit Madison's blog, I Feel The Love Project HERE. 

Please check out My Paper Crafting HERE to see how to play along with this week's challenge and check out the other DT's creations!!

Thank you so much for stopping by and happy hump day!

Wednesday, January 2, 2013

My Paper Crafting Snowflakes CWC Challenge

Hi everyone!! I'm very excited to announce that after doing My Paper Craftings 25 Days of Christmas showcase, I was asked to stay on for the new year as a regular designer. I'm so happy and honored to have been asked to continue creating with them.

Our first challenge for the new year is:

Originally, we were making snowflakes for this challenge to send to Newtown, CT to decorate the school for when the students return. However, due to the huge response, they are no longer accepting snowflakes. So instead we are asking you to create snowflakes projects to decorate your own homes and areas in honor of the children.

Our showcase coordinator Charlotte also suggested sending them on to the school board and they can use them for their facility or other facilities they choose.

Here is their address:

Newtown Board of Education:
3 Primrose St. Newtown CT 06470.

Alright, so here is what I created for my project:
This is a white A2 cardstock base and then I added a blue patterned paper and then my snowflake patterned paper on top of that. Then I stamped my sentiment which says, "Snowflakes are beautiful, pure, and white, and like God's children, no two are alike". Then I cut this snowflake from Create a Critter 2 and stickled it with stardust stickles glitter glue!
 The inside has the same mats and then I just added the cream mat with some Tim Holtz tea dye distress ink around the edges. Then I stamped the sentiment, "There's snowone quite like you". I then added another smaller snowflake and glitter glued that one too. 

Please check out My Paper Crafting to take a look at our other DT member's creations for this challenge and you can also see the rules/requirements for playing along. Thanks so much for stopping by today and for playing along with our Wonderful Wednesday's Craft with Cutters challenge!! 


Saturday, December 29, 2012

My Handmade Christmas Gifts for 2012

Hi all!! I hope you had a Merry Christmas and are looking to bring on the New Year!! I just wanted to share the handmade gifts that I created for everyone this year. I was definitely busy and creating some of these last minute!!

I have been teaching myself to crochet and my first project I decided to tackle was to make infinity scarves just using the single crochet stitch. These were made for all my hubby's siblings and his two cousins(all in elementary). The four on the left are his siblings'...they all had different colors they like. The black and yellow was for my hubby's cousin and she likes the Steelers. The navy blue and orange scarf is for the other cousin and her favorite team is the Bears. The kids liked them a lot and wore them the entire time they opened gifts.
 I packaged them in these super cute felt bags that I got at Hobby Lobby which were half off at the time!!
 My parents got a gift card to Olive Garden and this is the handmade gift card holder made using the Artiste cartridge and the spaghetti image is from the Fast Food cartridge.
 It pops up when you open up the gift card.
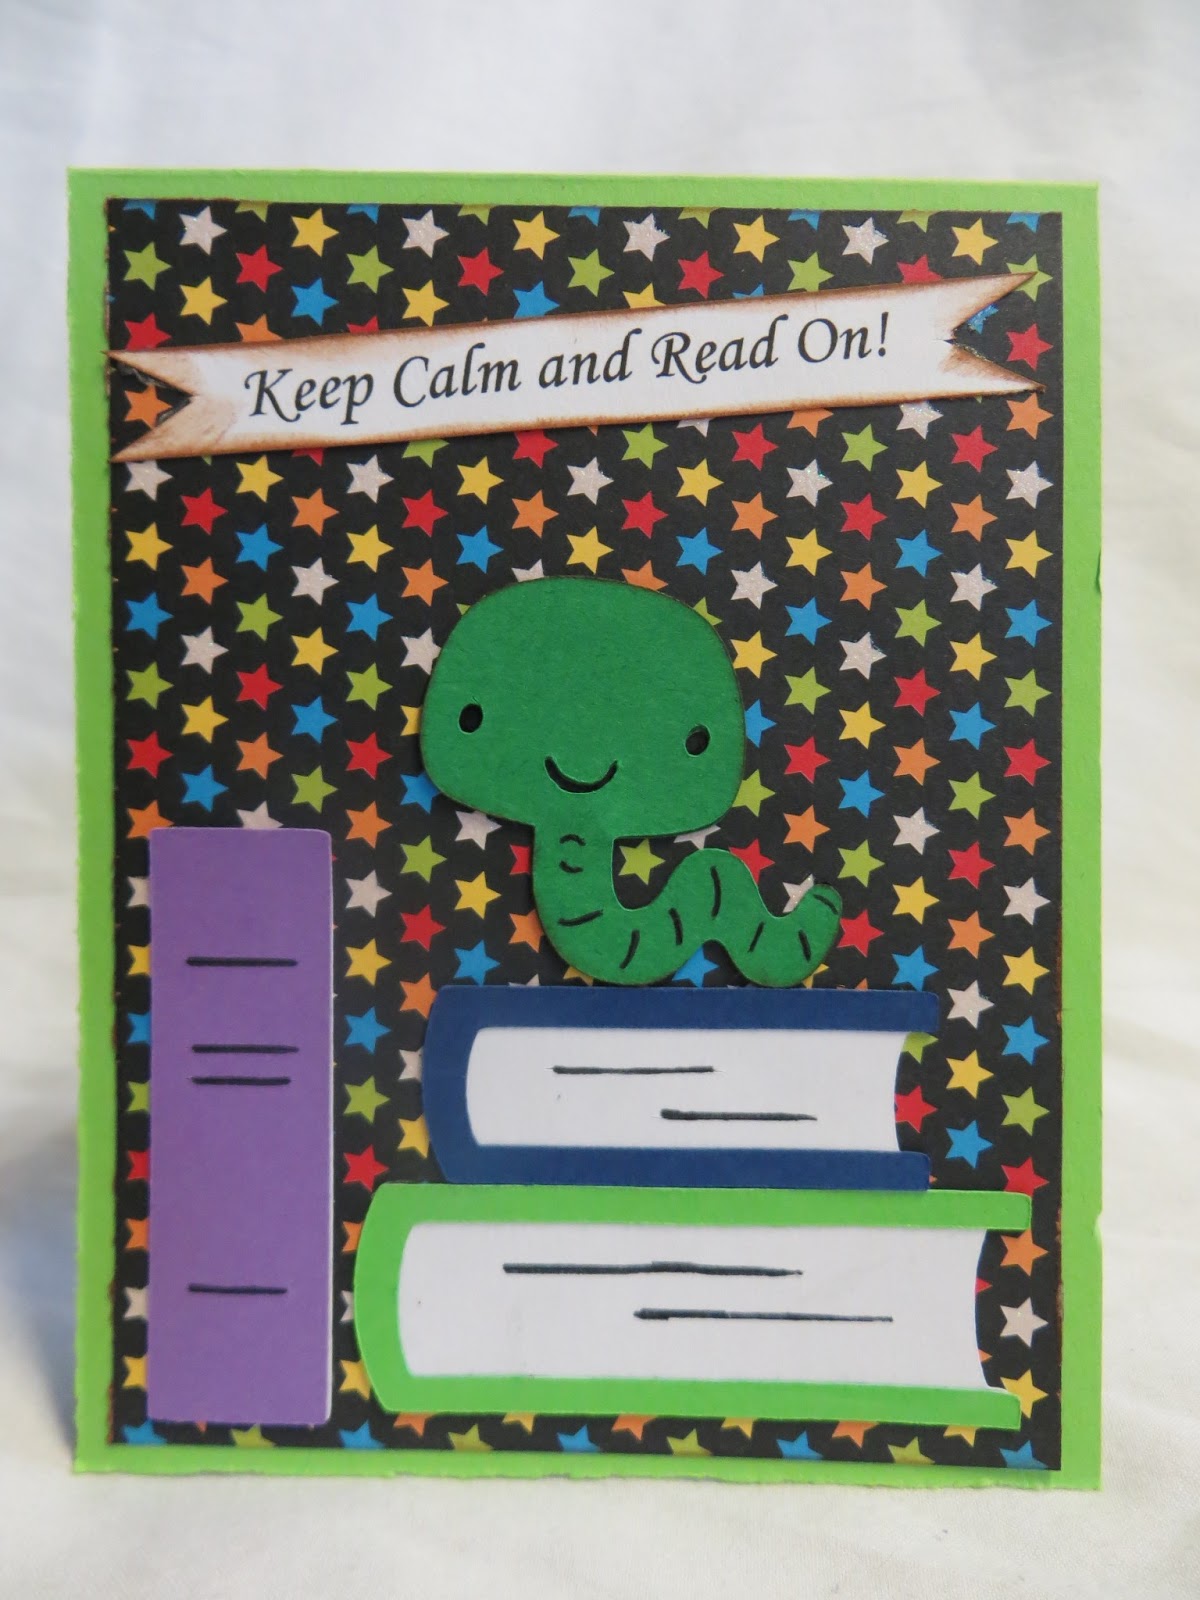
 Here are all the gift cards I made. All pop up. The presents ones are generic gift cards and then the two book gift cards are for Barnes and Noble gift cards and the book is made from Sugar and Spice cartridge.
 My hubby's family has many generations of scouters and this was at the 100th celebration of scouting at the Capitol. You can see the original post HERE. I wanted this to be a gift for my FIL and this was quite the work not only for the scrapbook layout but the framing of it. It is not in the frame as I wanted them to be able to open it on the wall to view the photos underneath. The hubby helped me with the framing part. He measured the flaps when they are closed and cut a slit down the front of the page protectors and when he slides the page in he opens the flap straight up and it goes down the strip and this way the inside photos are protected. Then we cut another page protector in half to slip over the flap that opens and to make it secure and snug, my hubby ironed the top of the protector to melt it shut and then when it cools slipped it over the flap. Then I added the navy blue paper to fill in the spaces above and below the layout and it looks like the Cub Scout uniforms my hubby's triplet brothers are wearing in the photos.

Then before putting the layout on frame, I glued page protectors over the navy blue parts to protect them as well and then glued on the layout on top.
 My FIL loved it and is going to put it in his office. This is what it looks like when you open it. The hubby's Grandpa and Uncle are also both scouters and loved it also.
 Then for all the tea drinker ladies in the hubby's family I made these tea dispenser boxes(all paper and a chipboard base) from this tutorial HERE. I cut the Tea canister from Love You a Latte cartridge and instead of cutting the letters for it out, just stamped "tea time" on the canister.
 They are packaged with Celestial Seasonings(my favorite tea brand) Holiday Teas: Nutcracker Sweet, Sugar Cookie Sleigh Ride, Gingerbread Spice, Sugar Plum Spice, and Candy Cane Lane. Because I gave them two of each flavor and was going to mix them(they are not individually packaged), I also made my own tea envelopes from the Artiste cartridge and made labels for them using Return Address labels. I made 50 of these envelopes!!! They turned out super cute and need to make one for myself now!

Phew!! And there is my handmade gifts for 2012 Christmas. Now I'll need to be on the lookout to find new ideas for next year. Thanks for visiting all!!


Friday, December 21, 2012

25 Days of Christmas Day 21: Sounds of the Season


Hi everyone!
Today is the third day of the 3rd Annual 25 Days Christmas and Year 'Round Crafting Showcase over at My Paper Crafting. I am so very proud to be on the Cricut designer team and to be able to help provide inspiration in this fun event. We have many designers designing for this showcase in the areas of Cricut, SVG, Digi's, Calendar Pages, and Vintage Graphics. There will be lots of inspiration, Daily freebies, and weekly prizes!! Join in on the fun!!

Today's challenge is:

Here is my creation:
This A2 card is blue with a shimmery, grey mat and this music, snowflake patterned paper on top of that. I embossed the snow with my cuttlebug snowflake folder and then made this cute Santa using the Winter Frolic cartridge. I stamped "Santa Claus is comin' to town!" for sentiment and then the music notes were cut from the Create a Critter 2 cartridge.

Thanks for taking a look and be sure to click the link above to view the other fabulous creations at My Paper Crafting.


Thursday, December 20, 2012

25 Days of Christmas Day 20: Stockings, Stuffers, and Silliness


Hi everyone!
Today is the third day of the 3rd Annual 25 Days Christmas and Year 'Round Crafting Showcase over at My Paper Crafting. I am so very proud to be on the Cricut designer team and to be able to help provide inspiration in this fun event. We have many designers designing for this showcase in the areas of Cricut, SVG, Digi's, Calendar Pages, and Vintage Graphics. There will be lots of inspiration, Daily freebies, and weekly prizes!! Join in on the fun!!

Today's challenge is:

Here is my take on the challenge:
White A2 card with a green mat and then a thin gold, shimmery mat on top of that and then this cute vintage stocking patterned paper mat on top of that. I made this stocking from Create a Critter 2 and then embossed the cuff with the swiss dots cuttlebug folder. The sentiment, "The stockings were hung by the chimney with care..." was made on my computer and then inked around. Super quick and cute!!

Thanks for taking a look and be sure to click the link above to view the other fabulous creations at My Paper Crafting.


Wednesday, December 19, 2012

25 Days of Christmas Day 19: December-Presents


Hi everyone!
Today is the third day of the 3rd Annual 25 Days Christmas and Year 'Round Crafting Showcase over at My Paper Crafting. I am so very proud to be on the Cricut designer team and to be able to help provide inspiration in this fun event. We have many designers designing for this showcase in the areas of Cricut, SVG, Digi's, Calendar Pages, and Vintage Graphics. There will be lots of inspiration, Daily freebies, and weekly prizes!! Join in on the fun!!

Today's challenge is:

Here is my take on this challenge:
This A2 card is red cardstock with a patterned blue paper on top and then the polka-dot patterned paper on top of that. The bunch of presents is cut from the Winter Frolic cartridge and the puppy and bone is from Create a Critter 2 cartridge.Super simple and cute!!

Thanks for taking a look and be sure to click the link above to view the other fabulous creations at My Paper Crafting.


Saturday, December 15, 2012

25 Days of Christmas Day 15: Rudy 'n' Friends


Hi everyone!
Today is the third day of the 3rd Annual 25 Days Christmas and Year 'Round Crafting Showcase over at My Paper Crafting. I am so very proud to be on the Cricut designer team and to be able to help provide inspiration in this fun event. We have many designers designing for this showcase in the areas of Cricut, SVG, Digi's, Calendar Pages, and Vintage Graphics. There will be lots of inspiration, Daily freebies, and weekly prizes!! Join in on the fun!!

Today's challenge is:


Here is my take on this challenge:
I made this A2 with red cardstock and then added a blue patterned paper on top of that and the tree paper measures at 4" X 5 1/4". I then ripped some white paper for the snow on the bottom. I cut Rudy and the sleigh from the Create a Critter 2 cartridge. Love this cartridge!! Then I stamped "Believe in Magic" at the corner and added some red stickles to Rudy's nose. Simple card to make!!

Thanks for taking a look and be sure to click the link above to check out the other fabulous creations at My Paper Crafting. 


Wednesday, December 5, 2012

25 Days of Christmas Day 5: Gingerbread Baking


Hi everyone!
Today is the third day of the 3rd Annual 25 Days Christmas and Year 'Round Crafting Showcase over at My Paper Crafting. I am so very proud to be on the Cricut designer team and to be able to help provide inspiration in this fun event. We have many designers designing for this showcase in the areas of Cricut, SVG, Digi's, Calendar Pages, and Vintage Graphics. There will be lots of inspiration, Daily freebies, and weekly prizes!! Join in on the fun!!

Day 5's Challenge is:

Here is what I did with today's challenge:
 This card is your standard 4 1/4" X 5 1/2" on green stock. This fun Christmasy baking paper is cut at 3 3/4" X 5 1/4" and then I tore some white paper for the snow frosting. The gingerbread house and gingerbread boy were cut from the cartridge, "Create a Critter 2". I added some stickles to my snow frosting on the ground, roof, and gingerbread boy's frosting. Then I added my sentiment in the corner which says, "Merry and Bright". 

Other photos:
 So cute!!

Thanks so much for taking a peek and check out everyone's projects at My Paper Crafting. Click the link at the top!!